Configuring Jenkins + Inboud-agent + Docker daemon on Docker environment
All of these containers will share volumes under the following directory /Users/joaopedroschmitt/work/jenkins/. Notice that for you environment you’ll need to change this accordingly to your machine. Before we start creating the containers, the first step is to create a docker network to isolate the containers.
docker network create jenkins
Jenkins master
This container is going to be the Jenkins master, it’ll store the pipelines and run the webserver. Run the following command to create it.
docker run \
  --name jenkins-master \
  --rm \
  --detach \
  --network jenkins \
  --network-alias jenkins \
  --publish 8080:8080 \
  --publish 50000:50000 \
  --volume /Users/joaopedroschmitt/work/jenkins/jenkins-master:/var/jenkins_home \
  jenkins/jenkins:lts-jdk11
Then keep tracking of the container starting log. When it has finished execute the following steps:
- Access localhost:8080
- Copy the initial admin password from the docker startup logs
- Past the password to advance to the next step.
- Install all of the suggested plugins.
- Create an admin user
- Open Jenkins home
- Go to Manage Jenkins > Manage Plugins > Available, search for docker and install Docker and Docker Pipeline plugins.
- Go to Manage Jenkins > Manage Nodes and Clouds > New Node, and set:
- Node name = jenkins-agent-1
- Permanent agent = check
- Click ok
- Remote root directory: /home/jenkins/agent
- Click save At first the new node will have status failed to connect. Copy the secret parameter because you’ll use it to create the docker agent in the next steps.
Docker daemon
Run this command do create the docker daemon service. This service will be used by the workers to run general purpose docker containers. The idea is to run the build steps through this daemon and isolate the host from running the containers.
docker run \
  --name jenkins-docker \
  --rm \
  --detach \
  --privileged \
  --network jenkins \
  --network-alias docker \
  --env DOCKER_TLS_CERTDIR=/certs \
  --volume /Users/joaopedroschmitt/work/jenkins/jenkins-docker-certs:/certs/client \
  --volume /Users/joaopedroschmitt/work/jenkins/jenkins-agent:/home/jenkins/agent \
  --publish 2376:2376 \
  docker:dind \
  --storage-driver overlay2
Docker agent
Then, build the custom docker agent image. This image will communicate with Jenkins master and run the docker builds steps bits in the daemon container. Notice that this image is customized to communicate with docker daemon too.
Fist, create the following docker file into agent/Dockerfile file.
FROM jenkinsci/jnlp-slave

USER root
RUN apt-get update && apt-get install -y apt-transport-https \
       ca-certificates curl gnupg2 \
       software-properties-common
RUN curl -fsSL https://download.docker.com/linux/debian/gpg | apt-key add -
RUN apt-key fingerprint 0EBFCD88
RUN add-apt-repository \
       "deb [arch=amd64] https://download.docker.com/linux/debian \
       $(lsb_release -cs) stable"
RUN apt-get update && apt-get install -y docker-ce-cli
USER jenkins
Next, build and start the given agent node. Notice you have to replace the sha-1 by the secret password genereted in the jenkins master node.
> docker build -t jenkins-docker-agent agent/
> docker run \
  --name jenkins-agent-1 \
  --rm \
  --detach \
  --network jenkins \
  --env DOCKER_HOST=tcp://docker:2376 \
  --env DOCKER_CERT_PATH=/certs/client \
  --env DOCKER_TLS_VERIFY=1 \
  --volume /Users/joaopedroschmitt/work/jenkins/jenkins-docker-certs:/certs/client:ro \
  --volume /Users/joaopedroschmitt/work/jenkins/jenkins-agent:/home/jenkins/agent \
  --init jenkins-docker-agent \
  -url http://jenkins:8080 \
  d35f878e126116b9329ecdb088d5b38e8775701a500030a2537098987a0686ba \
  jenkins-agent-1
Create a pipeline
Next step is to create a Jenkins pipeline. Open Jenkins (localhost:8080) and navigate to Dashboard. Click on new item and create a pipeline. In the screen that’s going to be opened past the following pipeline script.
pipeline {
    agent {
        docker { image 'node:14-alpine' }
    }
    stages {
        stage('Test') {
            steps {
                sh 'node --version'
            }
        }
    }
}
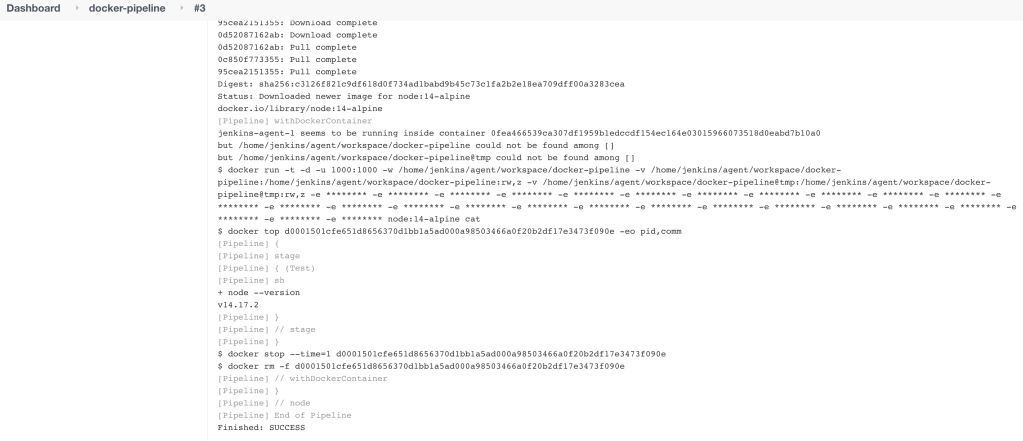
Before running the pipeline, go to Manage Jenkins > System Configuration and change “# of executors” to zero. Then start the pipeline (build now). The first time it runs the daemon will donwload the docker image, next time it’ll get from cache.
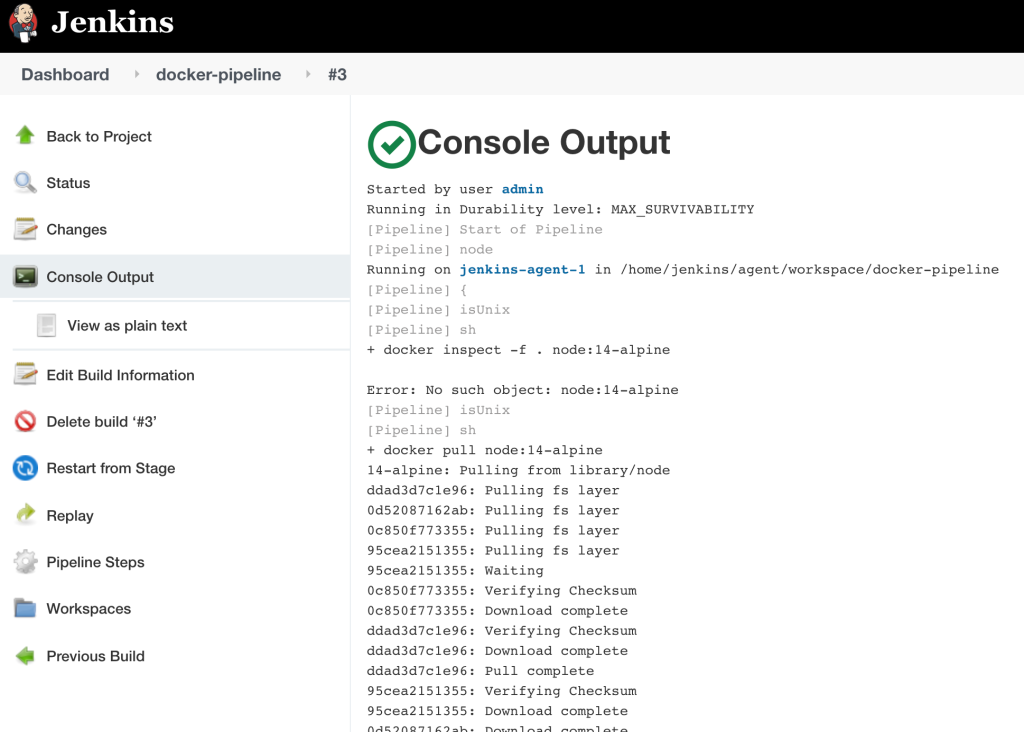
If everything is right, you should see the node version command running with success. As the following image:
References
https://www.jenkins.io/doc/book/pipeline/docker/