Quarkus Native + AWS Lambda + GitHub Actions
This article provides a simplified view of the process to start a new Quarkus Native project for AWS Lambda integrated with GitHub Actions. You can refer to Quarkus AWS Lambda docs for more details about the configuration options.
Requirements
- Maven 3.8.6
- OpenJDK 17.0.2
- Docker version 20.10.16
- AWS CLI 2.7.7
- AWS SAM 1.58.0
Create the base project using maven
To create a new Quarkus Native project, it’s needed to run the following command and provide the following values to generate the project structure.
mvn archetype:generate \
    -DarchetypeGroupId=io.quarkus \
    -DarchetypeArtifactId=quarkus-amazon-lambda-archetype \
    -DarchetypeVersion=2.13.0.Final

...
Define value for property 'groupId': com.sample
Define value for property 'artifactId': basic-project
Define value for property 'version' 1.0-SNAPSHOT: : 1.0.0
Define value for property 'package' com.sample: : com.sample
Project Structure
Usually, it’s a good idea to clean up files you won’t use. For example, for this project we are working with maven and not Gradle, so the three Gradle files can be deleted.
Besides that, the default project contains two additional Lambda handlers (UnusedLambda and StreamLambda) to show you other options on how to process requests, they can be deleted for now. By default, the archetype generates the TestLambda class and sets it as default in application.properties. We are not changing this configuration so we keep those files.
Testing your lambda locally
After having the project settings, you can test its execution on your local machine. For that you only need AWS SAM and Docker installed.
To start up the environment you need to build the app using Maven+Docker and run the simulated local Lambda environment using SAM+Docker.
The advantage of using docker to build the app is that you aren’t required to install GraalVM on your computer as Maven will run the docker image quarkus/ubi-quarkus-native-image to generate the native executable.
To build the app using Maven + Docker, run:
> mvn install -Dnative -DskipTests -Dquarkus.native.container-build=true
To run a single test agains the compiled image run:
> sam local invoke --template target/sam.native.yaml --event payload.json
If everything works fine you should see logs like these:
Invoking not.used.in.provided.runtime (provided)
Decompressing C:\temp\quarkus-native-aws-lambda-github-actions\target\function.zip
Image was not found.
Removing rapid images for repo public.ecr.aws/sam/emulation-provided
Building image...................
Skip pulling image and use local one: public.ecr.aws/sam/emulation-provided:rapid-1.58.0-x86_64.

Mounting C:\Users\ctw02257\AppData\Local\Temp\tmpgl4g2107 as /var/task:ro,delegated inside runtime container
START RequestId: 0492abc7-9c4b-4670-b5f1-b2cb56df273a Version: $LATEST
__  ____  __  _____   ___  __ ____  ______
 --/ __ \/ / / / _ | / _ \/ //_/ / / / __/
 -/ /_/ / /_/ / __ |/ , _/ ,< / /_/ /\ \
--\___\_\____/_/ |_/_/|_/_/|_|\____/___/
2022-09-30 15:07:31,002 INFO  [io.quarkus] (main) basic-project 1.0.0 native (powered by Quarkus 2.13.0.Final) started in 0.163s.
2022-09-30 15:07:31,024 INFO  [io.quarkus] (main) Profile prod activated.
2022-09-30 15:07:31,024 INFO  [io.quarkus] (main) Installed features: [amazon-lambda, cdi]
END RequestId: 0492abc7-9c4b-4670-b5f1-b2cb56df273a
REPORT RequestId: 0492abc7-9c4b-4670-b5f1-b2cb56df273a  Init Duration: 0.15 ms  Duration: 476.94 ms     Billed Duration: 477 ms Memory Size: 128 MB     Max Memory Used: 128 MB
{"result":"hello Bill","requestId":"0492abc7-9c4b-4670-b5f1-b2cb56df273a"}
Configuring AWS and GitHub Actions
Because we are deploying Quarkus Native in AWS through GitHub Actions, we need to set up the communication between GitHub and AWS. It requires configuring AWS to grant access to GitHub through OIDC, this way we can make GitHub assume roles with proper permissions and then manipulate AWS resources through pipeline scripts. You can easily do that by using CloudFormation and the AWS CLI by following the steps below.
1 - Configure your CLI credentials
aws configure # to configure your AWS credentials through the CLI
2 - Create a file github-cf.yaml containing the following CloudFormation content. For further reference please refer to AWS + GitHub Actions and ThumbprintList. Replace <account-name> and <repo-name> with your’s respective values.
AWSTemplateFormatVersion: 2010-09-09
Description: 'Cloudformation for GitHub actions integration'

Resources:
  IDCProvider:
      Type: AWS::IAM::OIDCProvider
      Properties:
          Url: "https://token.actions.githubusercontent.com"
          ClientIdList:
            - "sts.amazonaws.com"
          ThumbprintList:
             - 6938fd4d98bab03faadb97b34396831e3780aea1

  GitHubIAMRole:
      Type: AWS::IAM::Role
      Properties:
          RoleName: GithubActionsDeployRole
          AssumeRolePolicyDocument:
             Statement:
               - Effect: Allow
                 Action: sts:AssumeRoleWithWebIdentity
                 Principal:
                   Federated: !Ref IDCProvider
                 Condition:
                   ForAnyValue:StringLike:
                      token.actions.githubusercontent.com:sub:
                      - !Sub repo:<account-name>/<repo-name>:*
          MaxSessionDuration: 3600
          Description: "Github Actions role"
          Policies:
          - PolicyName: 'GithubActionsDeployRole-policy'
            PolicyDocument:
              Version: '2012-10-17'
              Statement:
              - Effect: Allow
                Action: '*'
                Resource: '*'
Apply the CloudFormation template with the following command
aws cloudformation deploy \
    --region eu-west-1 \
    --template-file github-cf.yaml \
    --capabilities CAPABILITY_NAMED_IAM \
    --stack-name github-cf
If everything works as expected you should see a new Open Identity Provider created and the GithubActionsDeployRole trusting your repository to talk to AWS on the IAM Console

Configuring GitHub Action pipeline
The GitHub pipeline will build and deploy both the infrastructure and the application in one shot. Unfortunately, because we are not able to deploy a blank lambda function without code we need to build the app, deploy it somewhere, and create the lambda function pointing to the app file. Therefore, it was decided to apply the following strategy:
- Compile the application to generate the native binary
- Create an empty S3 bucket
- Upload the native binary to the S3 bucket
- Create the Lambda function with code pointing to the file just uploaded to the S3 bucket
- Upload the native binary to the lambda function (so we always run the latest version)
- Run a simple invocation test
So let’s get started by creating the AWS resources. The first step requires us to create the S3 bucket, for that we have to create the CloudFormation file deploy-stack.yaml at the project’s root directory and paste the following content.
AWSTemplateFormatVersion: "2010-09-09"
Description: Lambda with Quarkus Native

Resources:

  BaseLambdaRepositoryS3Bucket:
    Type: 'AWS::S3::Bucket'
    DeletionPolicy: Delete
    Properties:
      BucketName: aws-lambda-quarkus-native-github-actions
      PublicAccessBlockConfiguration:
        BlockPublicAcls: true
        BlockPublicPolicy: true
        IgnorePublicAcls: true
        RestrictPublicBuckets: true
Next we have to create the lambda function. Let’s create the CloudFormation file lambda-stack.yaml with the following content. This configuration will create a Lambda function and a specific to it.
AWSTemplateFormatVersion: "2010-09-09"
Description: Lambda with Quarkus Native

Parameters:
  LambdaName:
    Type: String
    Default: simple-quarkus-native-lambda

Resources:

  LambdaExecutionRole:
    Type: AWS::IAM::Role
    Properties:
      AssumeRolePolicyDocument:
        Version: '2012-10-17'
        Statement:
        - Effect: Allow
          Principal:
            Service:
            - lambda.amazonaws.com
          Action:
          - sts:AssumeRole
      Path: "/"
      Policies:
      - PolicyName: root
        PolicyDocument:
          Version: '2012-10-17'
          Statement:
          - Effect: Allow
            Action: logs:CreateLogGroup
            Resource: !Sub 'arn:aws:logs:${AWS::Region}:${AWS::AccountId}:*'
          - Effect: Allow
            Action:
            - logs:CreateLogStream
            - logs:PutLogEvents
            Resource: !Sub 'arn:aws:logs:${AWS::Region}:${AWS::AccountId}:log-group:/aws/lambda/${LambdaName}:*'

  LambdaFunction:
    Type: AWS::Lambda::Function
    Properties:
      FunctionName: !Ref LambdaName
      Handler: io.quarkus.amazon.lambda.runtime.QuarkusStreamHandler::handleRequest
      Runtime: provided
      Role: !GetAtt LambdaExecutionRole.Arn
      Timeout: 15
      MemorySize: 256
      Code:
        S3Bucket: aws-lambda-quarkus-native-github-actions
        S3Key: function.zip # This binary must exist there before this template is applied
      Environment:
        Variables:
          DISABLE_SIGNAL_HANDLERS: true
Finally, let’s create the GitHub Actions workflow to deploy everything as per the sequence mentioned above. Create the file .github/workflows/deploy.yaml at the project’s root directory with the following content:
name: Deploy Lambda Function

on:
  push:
    branches: [main]
  workflow_dispatch:

env:
  AWS_ROLE: arn:aws:iam::12345678910:role/GithubActionsDeployRole # Role to assume through OIDC
  AWS_REGION:
  CI: false # Change it to true to break the build on Warnings

jobs:

  deploy:
    runs-on: ubuntu-20.04
    permissions:
      id-token: write
      contents: read
    steps:
      - name: Setup repository
        uses: actions/checkout@v3
      - name: Setup AWS credentials
        uses: aws-actions/configure-aws-credentials@v1
        with:
          role-to-assume: ${{ env.AWS_ROLE }}
          role-session-name: GitHub-Action-Role
          aws-region: ${{ env.AWS_REGION }}
      - name: Setup GraalVM
        uses: graalvm/setup-graalvm@v1
        with:
          version: 'latest'
          java-version: '17'
          components: 'native-image'
          github-token: ${{ secrets.GITHUB_TOKEN }}
      - name: Build native executable
        run: mvn clean package -Dnative -B
      - name: Upload native executable
        run: |
          aws cloudformation deploy \
            --region ${{ env.AWS_REGION }} \
            --template-file deploy-stack.yaml \
            --capabilities CAPABILITY_IAM \
            --stack-name sample-quarkus-native-deploy

          aws s3 cp target/function.zip s3://aws-lambda-quarkus-native-github-actions

          aws cloudformation deploy \
            --region ${{ env.AWS_REGION }} \
            --template-file lambda-stack.yaml \
            --capabilities CAPABILITY_IAM \
            --stack-name sample-quarkus-native-lambda

          aws lambda update-function-code \
            --function-name simple-quarkus-native-lambda \
            --zip-file fileb://target/function.zip

          aws lambda invoke \
            --function-name simple-quarkus-native-lambda \
            --region ${{ env.AWS_REGION }} \
            --payload '{"name":"Bill","greeting":"hello"}' \
            --cli-binary-format raw-in-base64-out \
            response.json

          cat response.json
As you can see in the deploy.yaml file, the first three steps are used to checkout the source code, configure AWS credentials and set up the GraalVM. Next, we build the Native Image and finally we run a series of commands to accomplish the sequence of 6 actions defined at the beginning of this section.
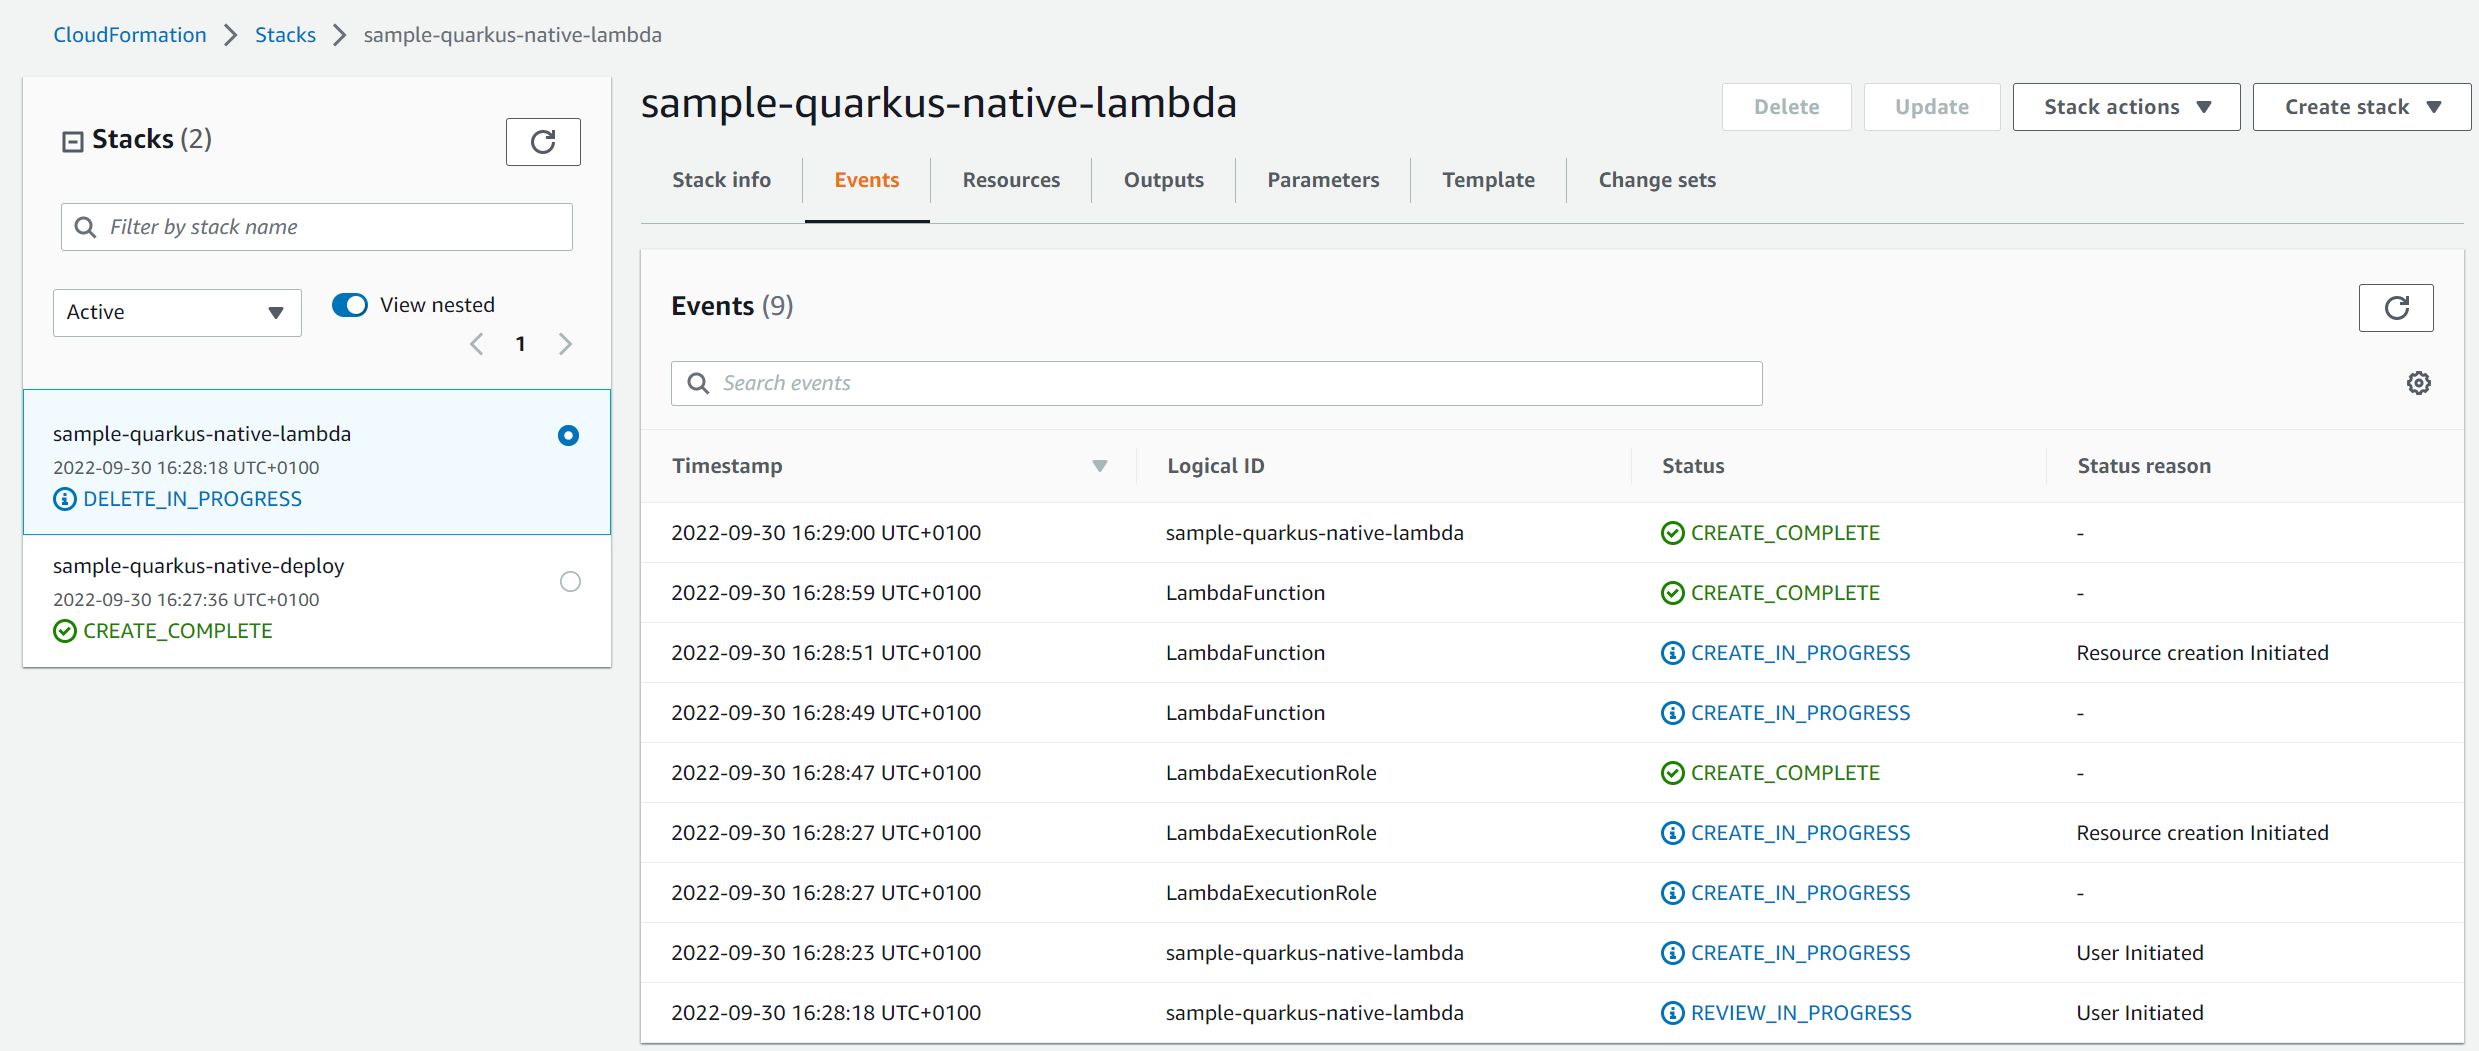
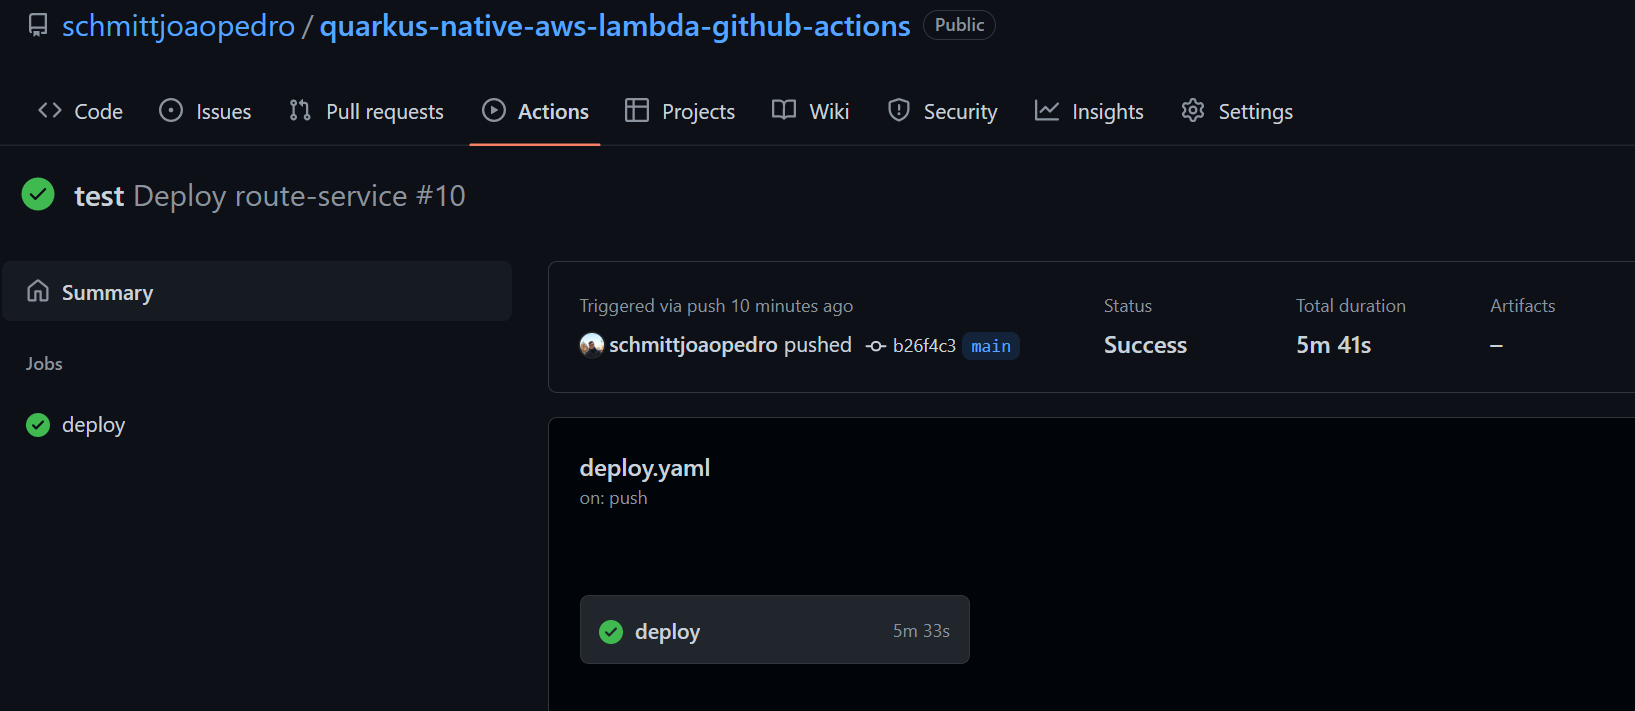
After all the files have been pushed to GitHub, Actions will fire a new Workflow automatically. You can see the execution of it by clicking on the “Actions” tab on GitHub. If everything works as expected you should see the workflow with a green check as follows:
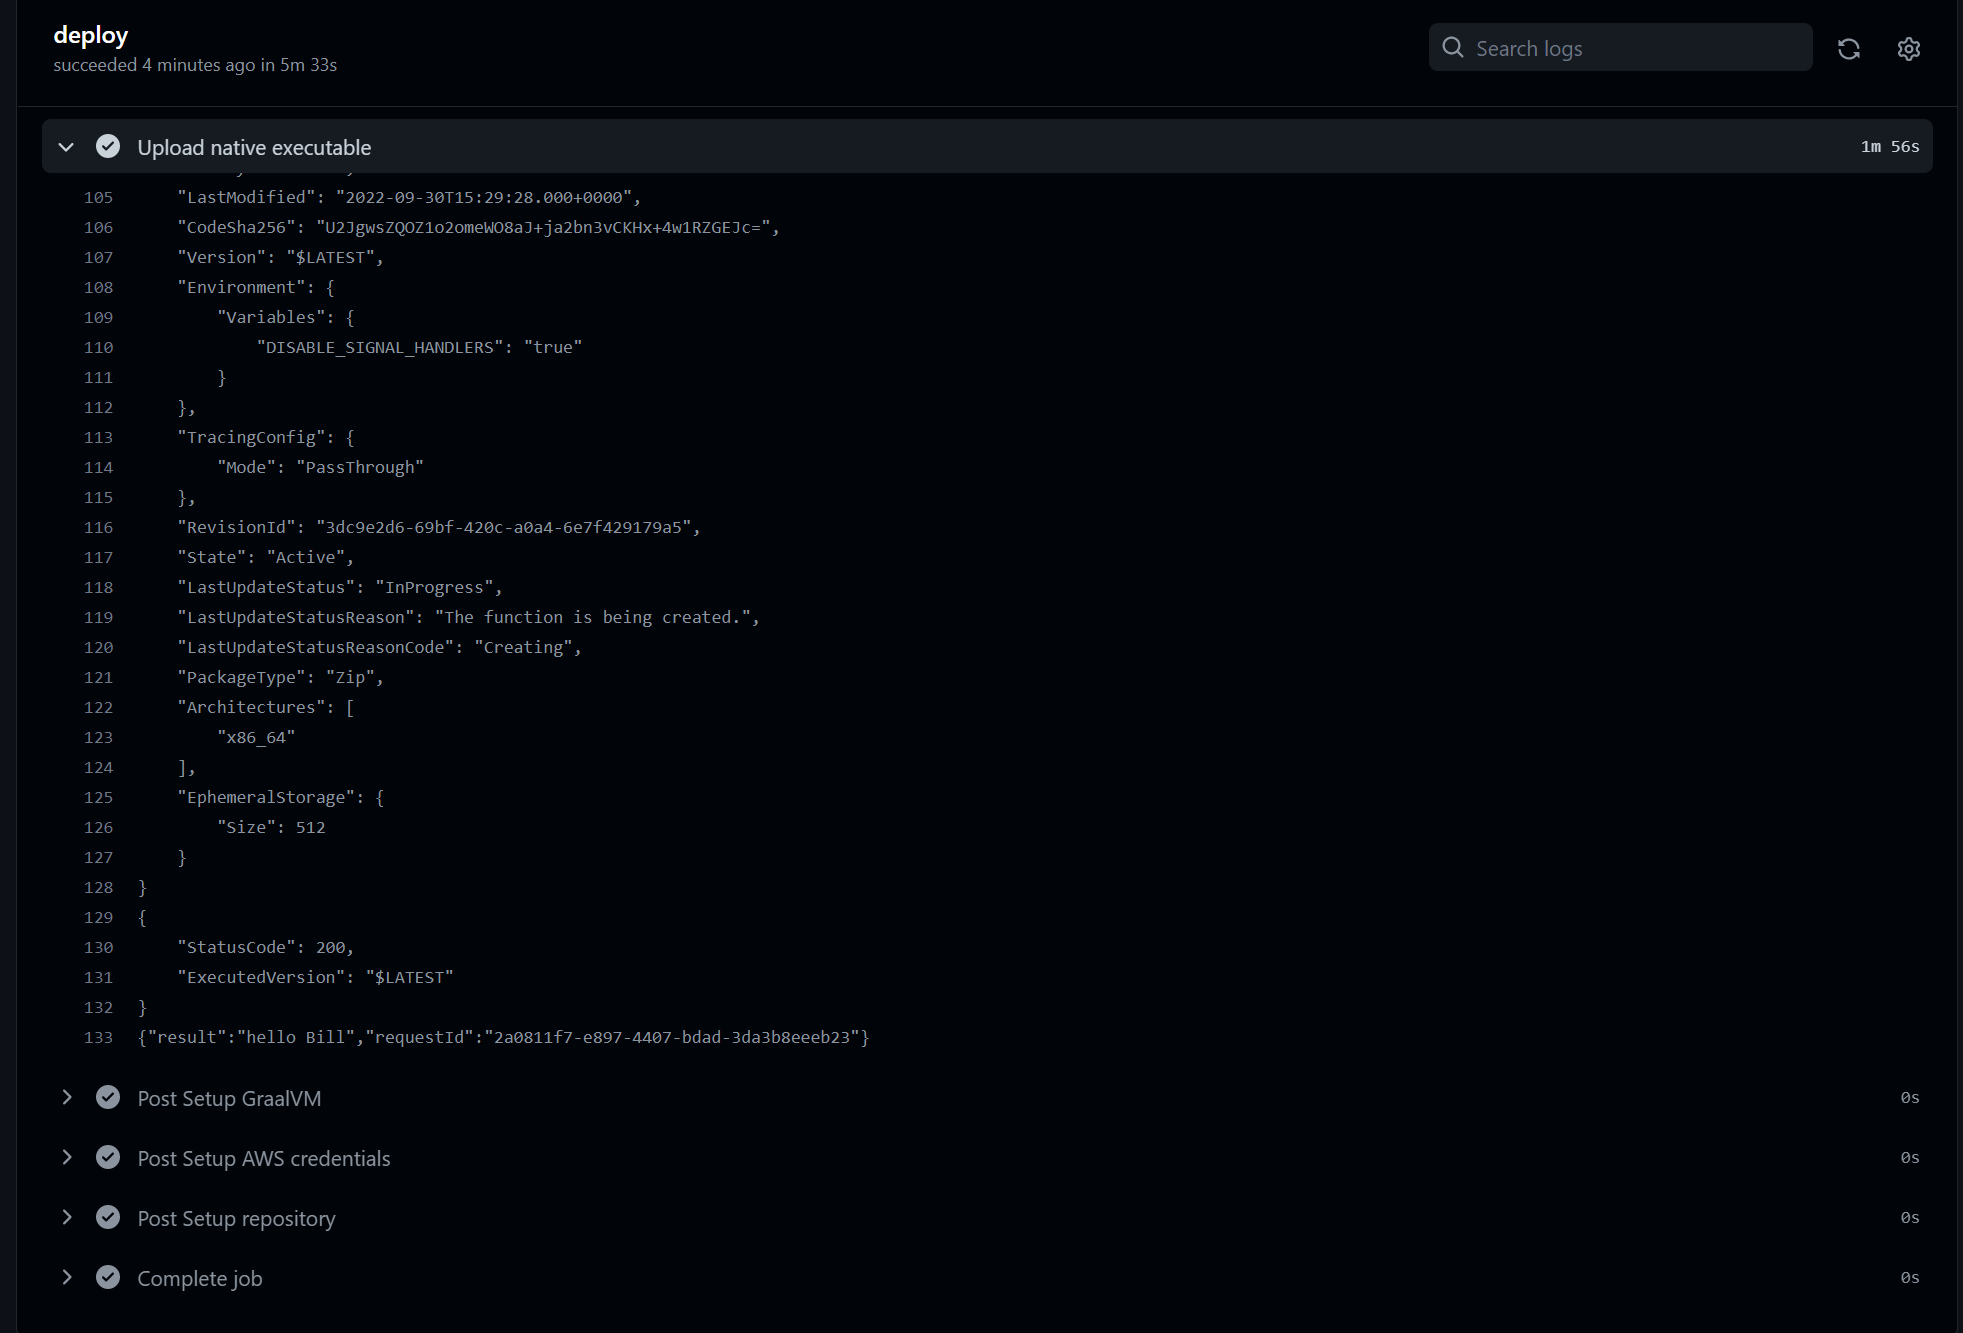
And by entering the Workflow and expanding the “Upload native executable” section you should see the logs ending similarly to the following image:
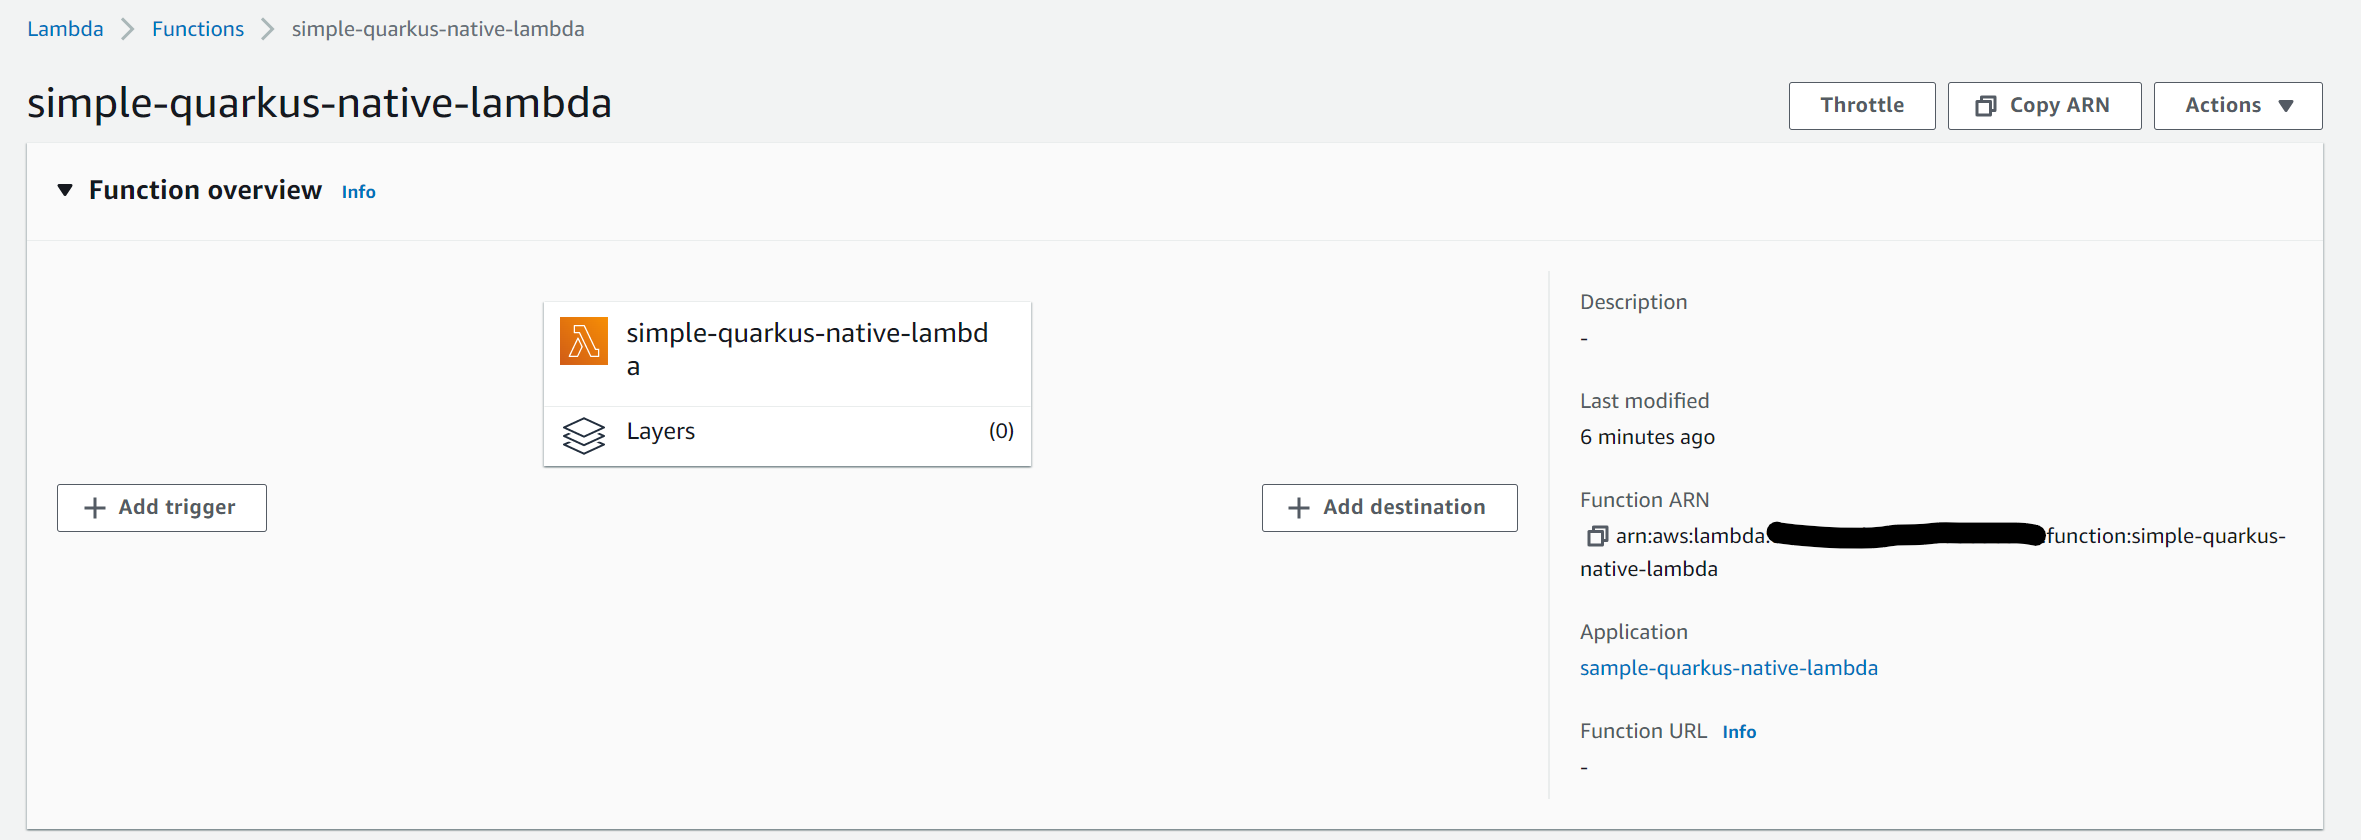
You can also verify if the lambda function was properly created using the AWS console as follows:
You can also test the Lambda function through the console if you want. It’s just needed to click on the Lambda’s Test tab, create a new test case, and copy and paste the content of payload.json into the data area. Finally, click on the Test button, and if everything went well you should see an output similar to the one in the following image:

Clean up
If you have come this far with success, you can clean up all resources to prevent charging your account. Before deleting the bucket stack on CloudFormation remember to remove all files from the buckets.